Rogue
Example 1
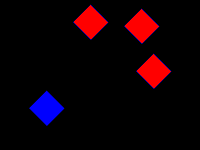
You (blue) are facing three enemies (red), wanting to blind them all. That's a fairly simple job, but the two Warriors of your group (not in the sketch) would really appreciate it if you blinded them at specific places.

It's very likely they'd be a bit grumpy if you did it like so. While you might say that this would be a strange way to do it, I can assure you that some actually do something along the lines of this, and it's extremely bothering.
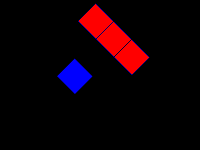
With two Warriors (or Monks) in your group, they'll want to attack the enemies from opposite sides in order to do maximum damage. With a line-up as shown above, the Warriors have easy access to all three enemies, and don't have to fear being hit by another enemy in the process. Furthermore you can use spells like Breisleich to make the enemies fight each other rather simply with this formation.
Example 2

Another simple example. An enemy (red) is right behind you (blue), chasing you past a tree. There's only one enemy to blind so there's really no rush.

The simplest thing to do would be to just place a few traps and hope it stumbles upon one of them. However, that could easily produce the above situation (the black cross denotes the enemy being blinded). As in example 1, you'll want the enemy so the Warriors can get it from opposite sides, which is impossible in this case.
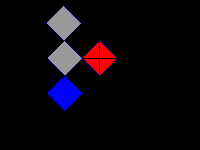
Instead, hold on to those blind traps for a few more moments and place the enemy like so. This way both Warriors have easy access to the enemy, even allowing a third and fourth Warrior to join the action.
Example 3
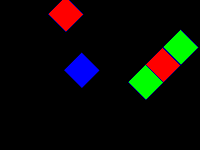
Finally moving onto something slightly more advanced. On your right you (blue) have two Warriors (green) fighting a lone enemy (red). However, there's an enemy approaching from the left, targeting the lower Warrior. Of course, your job is to stop it, so how will you accomplish it?
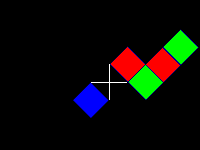
For reasons I am simply unable to understand many just place a blind trap near the Warrior and expect him to lead the enemy over it. That is not his job - it's yours! This way he'll have to leave the battle he was in, possibly dragging the first enemy with him, completely messing up any kind of plan he had. Note that the white cross symbolises a blind trap.
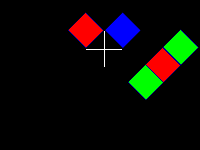
This is where the famed dexterity of the Rogue comes into play. You'll have to move fast to accomplish this move, but it is possible, and it is your job. This way the enemy will be stopped before it reaches the battle, allowing the Warriors to do their job, not having to take care of yours. Always remember that your group members can't see the blind trap, and rarely have any idea where it is. You can't expect them to lead an enemy over something they can't even see.

Rogue